February 2010 - Level 3 Inspection

Archive for February, 2010

Tools and Dies

Tools and Dies

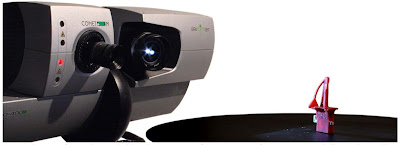
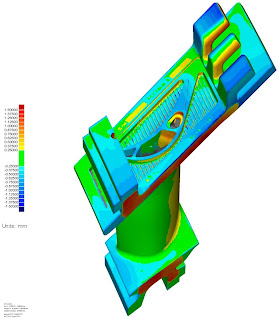
In a product life cycle the largest investment is always the tooling. Until now the actual geometry of the wax or core die has been largely unknown. Level 3 Inspection can use White Light Scanning (WLS) with computer-aided-inspection (CAI) to compare the die to the CAD model, other dies and scans of the same die taken over a period of time, to trend wear. This technology gives our customers a new and profound insight into the size shape and geometric conformance of their dies that they have never had before. By inspecting and perfecting the actual die Level 3 can help their customers quantify shrink rates, identify problem areas in the die and bring better castings to market, faster than ever before.

Level 3 Inspection’s SmartCompare process gives their customers the ability to identify problems with a particular area of the part and focus efforts to improve problem areas without spending time and resources on areas that are known to be conforming. This is especially helpful when dealing with middle step products, such as tools and dies. The ability to quickly compare the product die to the nominal CAD model as well as the ability to compare multiple dies and multiple scans of the same die over time, gives Level 3 Inspection’s customers an big advantage in regard to quality and time to market.

Comparing: Airfoil cavity to CAD model
Contact us today to start getting superior inspection results in shorter time with easier understanding leading to higher confidence

Investment Casting

Investment Casting

More, better, faster is probably the mantra of every manufacturer, especially as it applies to quality inspection.

Level 3 Inspection has found a solution to the more-faster-better inspection dilemma. The company has implemented a SmartFAI process that combines White Light Scanning (WLS) with computer-aided-inspection (CAI).

The combination gives Level 3 the ability to perform more comprehensive inspections on parts in a shorter amount of time. The SmartFAI First Article Inspection (FAI) process involves verifying every feature on the part by comparing it to a customer-supplied part print and 3D CAD model. First-article inspections are done prior to full production release and often while a part is in development.
The Level 3 approach replaces traditional plate inspection or a CMM system with WLS, which can capture and calculate precise 3D coordinates for millions of points in seconds.
Contact us today to start getting superior inspection results in shorter time with easier understanding leading to higher confidence.
Level 3 Inspection LLC 21st Century Measurement & Inspection Technologies
1239 SE Indian Street, Suite 107, Stuart, FL 34997, sales@level3inspection.com
MENU