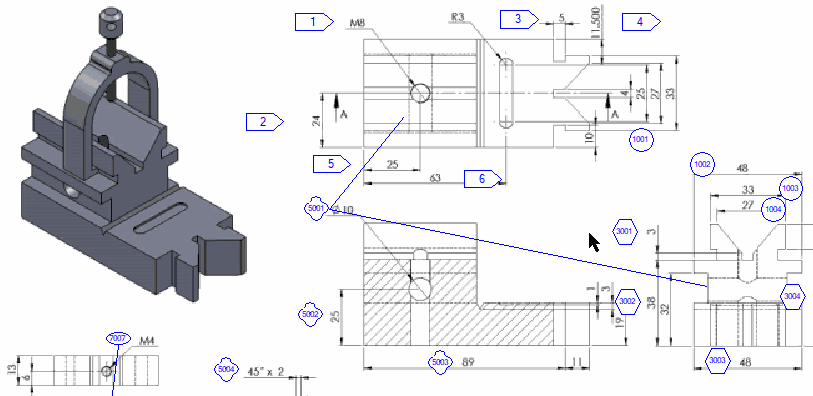
What is a ballooned or itemized drawing?
A ballooned drawing contains numbered “balloons” that point to individual dimensions and requirements of the part. The numbers on the ballooned drawing correlate with the numbers found on the Dimensional Data Sheet or Report (e.g. AS9102 Form 3).
 Ballooning a drawing makes it easy to cross reference the measurements on a data sheet to the dimensions laid out on a drawing.
At Level 3, we use a custom specification that categorizes dimensions for further ease-of-use. Some drawings can have dimensions numbering in the thousands, so it’s important to keep organized!
In addition to ballooning drawings, we can create custom “blank” dimension reports for you with the specific characteristics from your part already filled in, including nominal and tolerances.
While it may seem simple, ballooning a drawing is one of the most important and foundational aspects of the inspection process. Efficient ballooning practices set the stage for reporting and communications, minimizing errors and delays down the line. Many of our customers turn to us for fast, accurate ballooning that they otherwise don’t have the time to perform.
Have a blueprint you need itemized? No matter how complex, our experts can quickly and accurately get you what you need.
Fill out the form below or Call us today at 772-444-7534 for a fast, free quote.
